Dashboard
Workspaces
Workspaces are an organizational structure for teams to collaborate on their shared collections of repositories. Rather than users owning Repositories, Branches and Data, workspaces own everything. A user gains access to all of this by becoming a member of a workspace, their specific permissions being defined by that workspace's roles.
If you have a Sedaro account, you can create a Workspace by clicking the "+ New Workspace" button on the Navigation Bar.
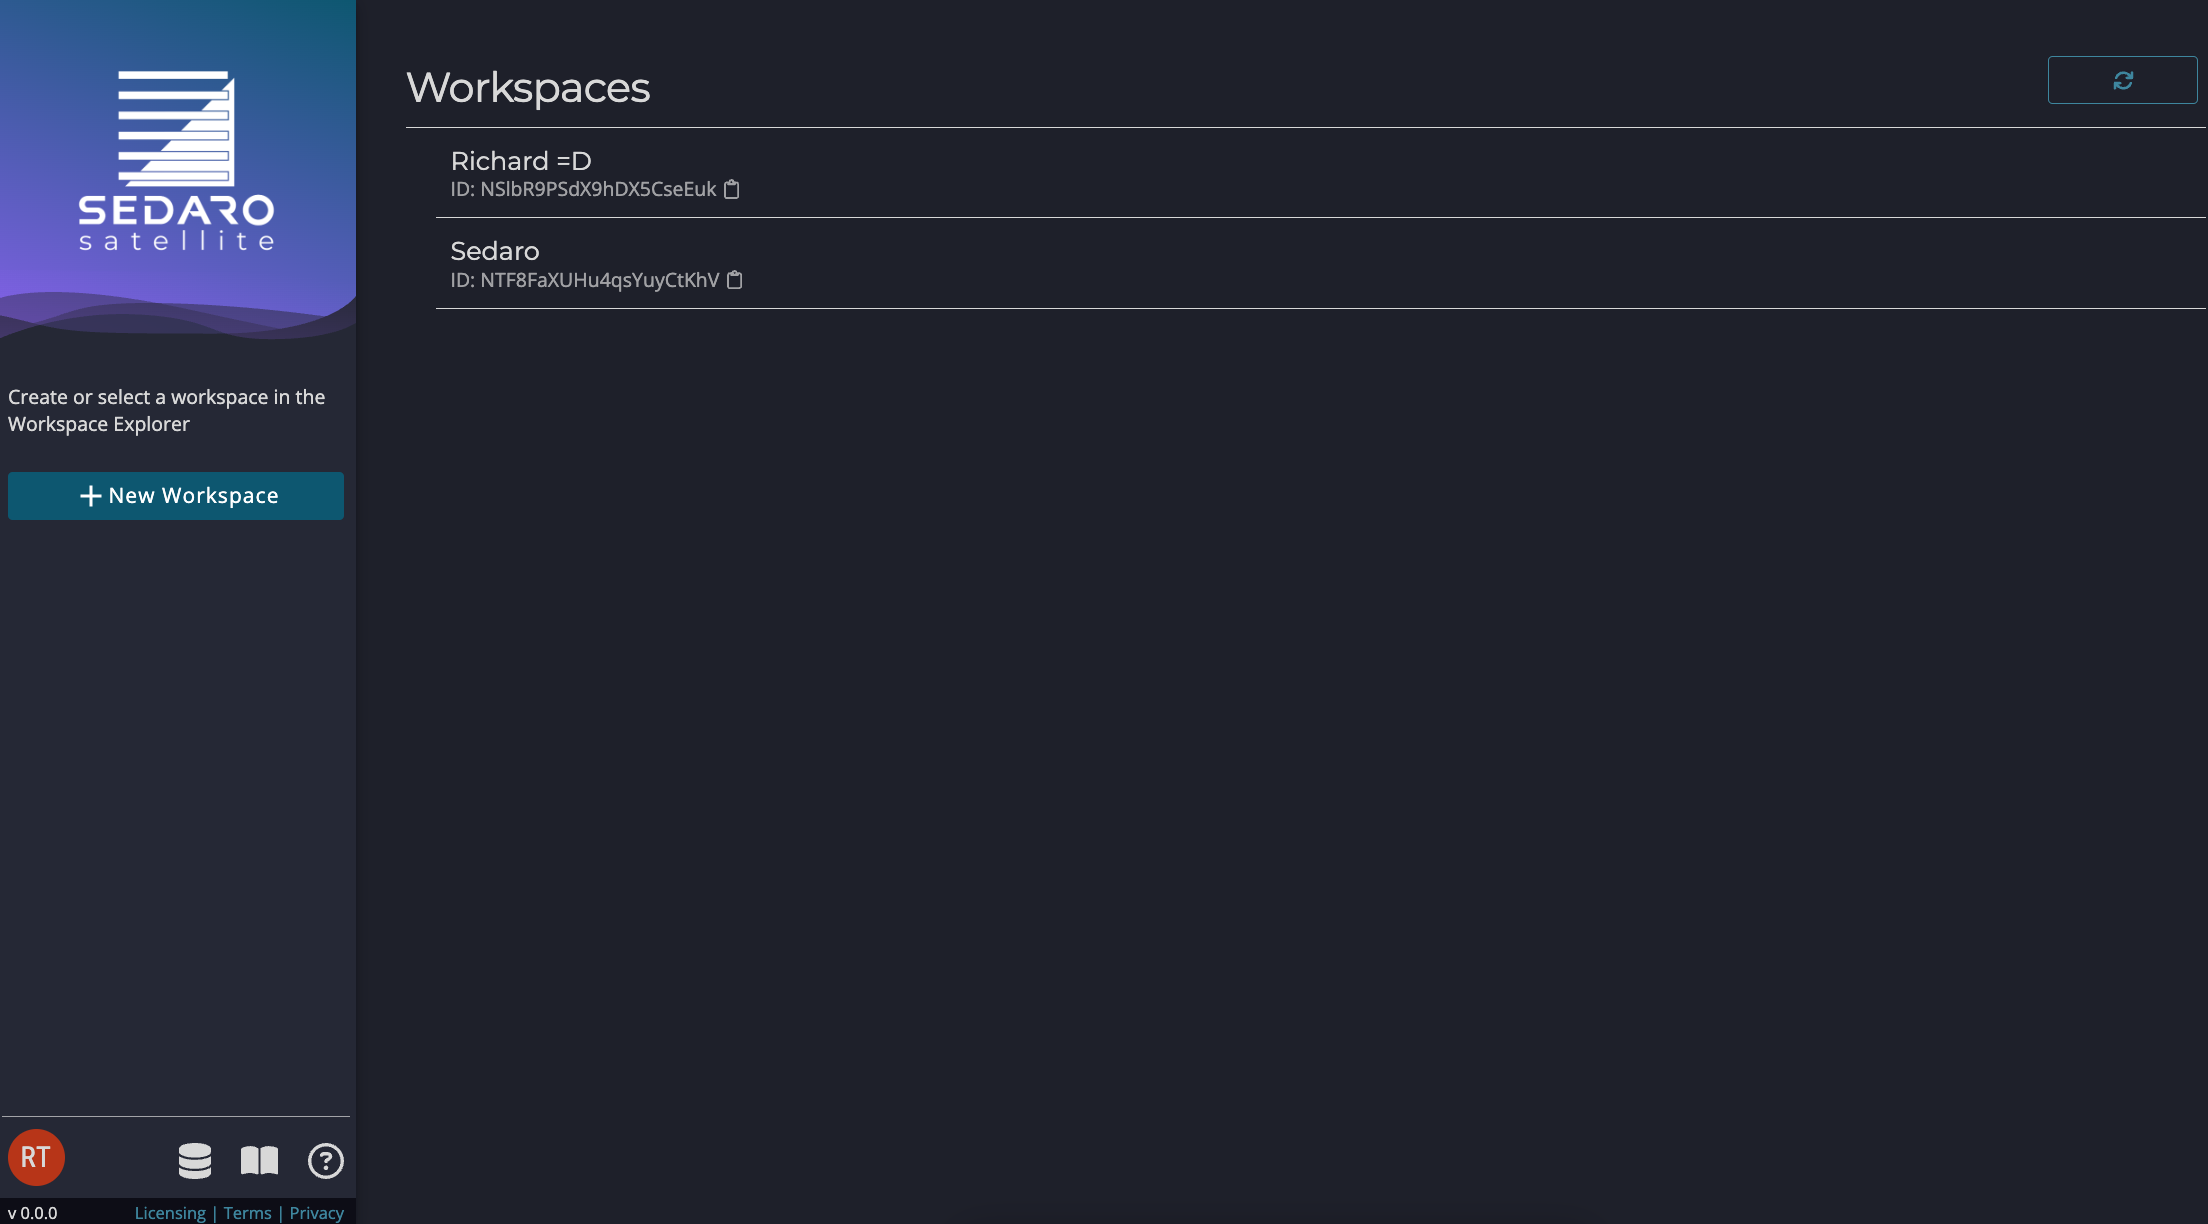
My Workspaces
Repositories
Sedaro allows you to manage projects via repositories. Upon creating a Workspace, it will be pre-populated with demos from Sedaro. You can access the Repositories view at any time by using the Repositories button at the bottom left, or by clicking the Sedaro logo at the top left.
Click on a repository to view its existing branches. Branches allow you to make experimental changes to your Scenario or Agent while leaving the original version unchanged. Create a new branch by clicking the "Branch" button. You can make changes to the new branch and choose to "Commit" them or discard them by deleting the branch. If you want to apply the changes in a new branch to an old branch, you can use the "Merge" button. Finally, the history of commits is accessible via the "History" button.
You can create a new Repository by clicking the button in the left panel. Give the repository a name and a description, and select a type of either Agent or Scenario. You can change the name and description later using the Edit button.
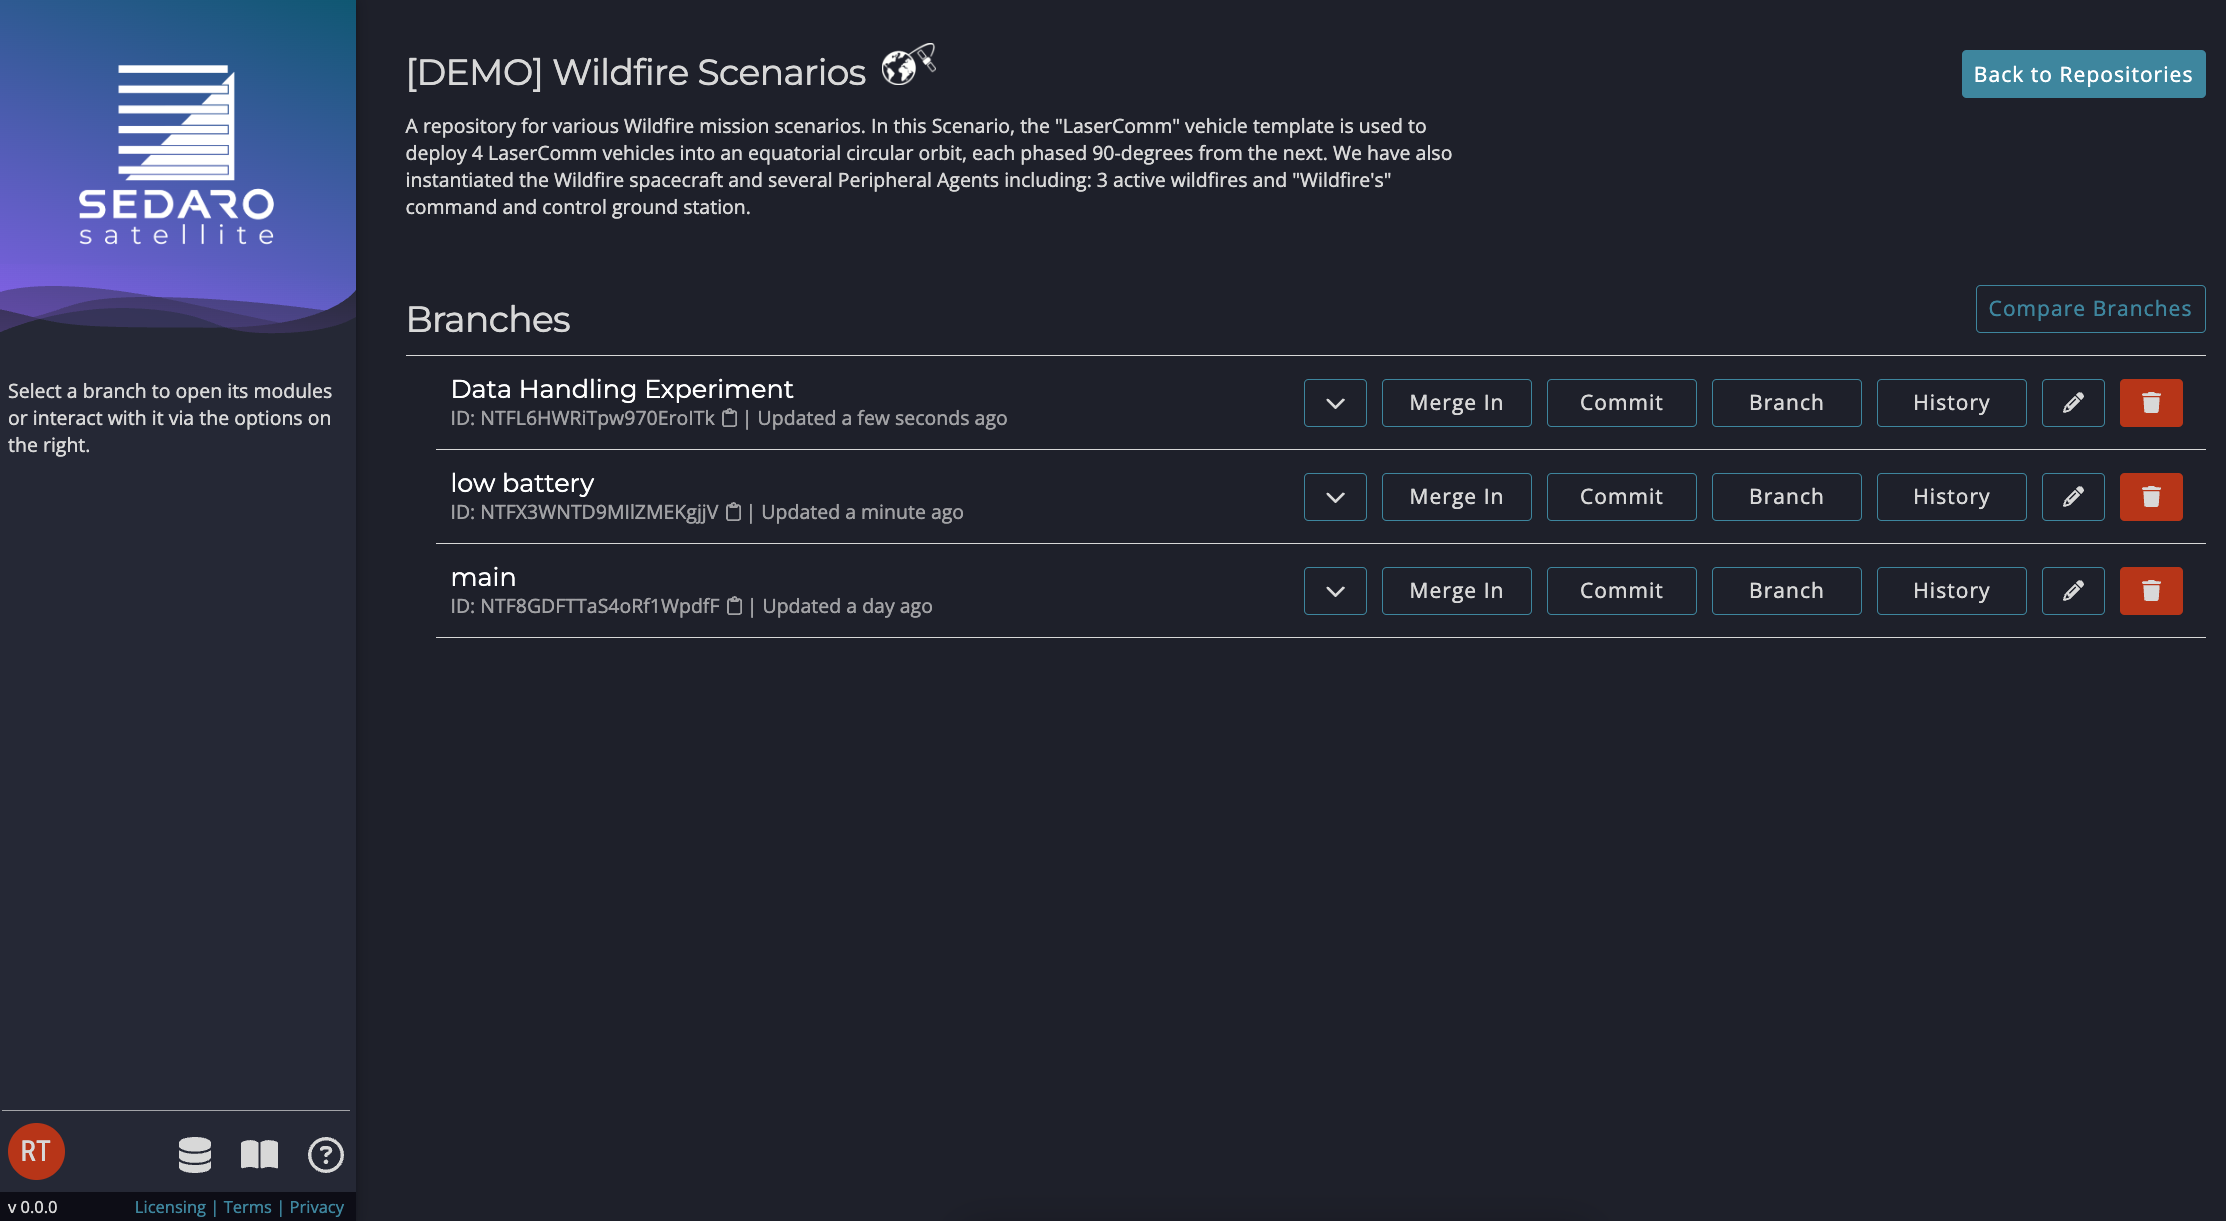
Wildfire Scenarios Repository
Agent Repositories
In an Agent Repository, you can design the vehicle template for your digital twin. In the Agent Edit view, you design everything about your vehicle: power generation and storage, geometry, actuators and pointing modes, routines, and more.
Scenario Repositories
In a Scenario Repository, you can design and analyze a mission that utilizes any combination of your Agent Templates. Here you can assign orbits to your vehicles, add in any Peripheral Agents that are not full digital twins, and make other assignments related to your overall concept of operations. Most importantly, this is where you go to simulate and view simulation results!
Members and Roles
A Workspace can have one or more members. New members can be invited via email in the "Members" menu. Each member can be assigned a role, which is a named set of permissions. Each Workspace is instantiated with four roles:
- Guest:
- Can view, but not edit, repositories and branches
- Can view the progress and results of, but not launch, simulations
- Designer:
- All Guest permissions
- Can edit repositories and branches
- Can launch/abort simulations
- Can view workspace members and their associated roles
- Administrator:
- All Designer permissions
- Can add and remove workspace members
- Can assign roles to members
- Can manage the workspace’s Sedaro license
- Owner:
- All Administrator permissions
- Can edit or delete the workspace itself
There must always be at least one Owner in a workspace, and an Owner cannot leave a workspace or demote themselves without first assigning another member Owner permissions. Currently, the default role when adding a Member to a Workspace is Designer.
Custom Roles are currently in development. These will allow for more granular control of view/edit access: for example, setting permissions specific to a repository.
Sedaro Tools
The bottom-left corner of all Sedaro views show the main Sedaro tools: Account Management, Dashboard (Repositories View), Documentation, and Support. It also includes the current version number, as well as links to our privacy policy, terms and conditions, and licensing policy.

Sedaro Tools
Clicking on your initials will bring you to Account Management, where you can update your user and login information and generate an API key for use with the Sedaro API Client.
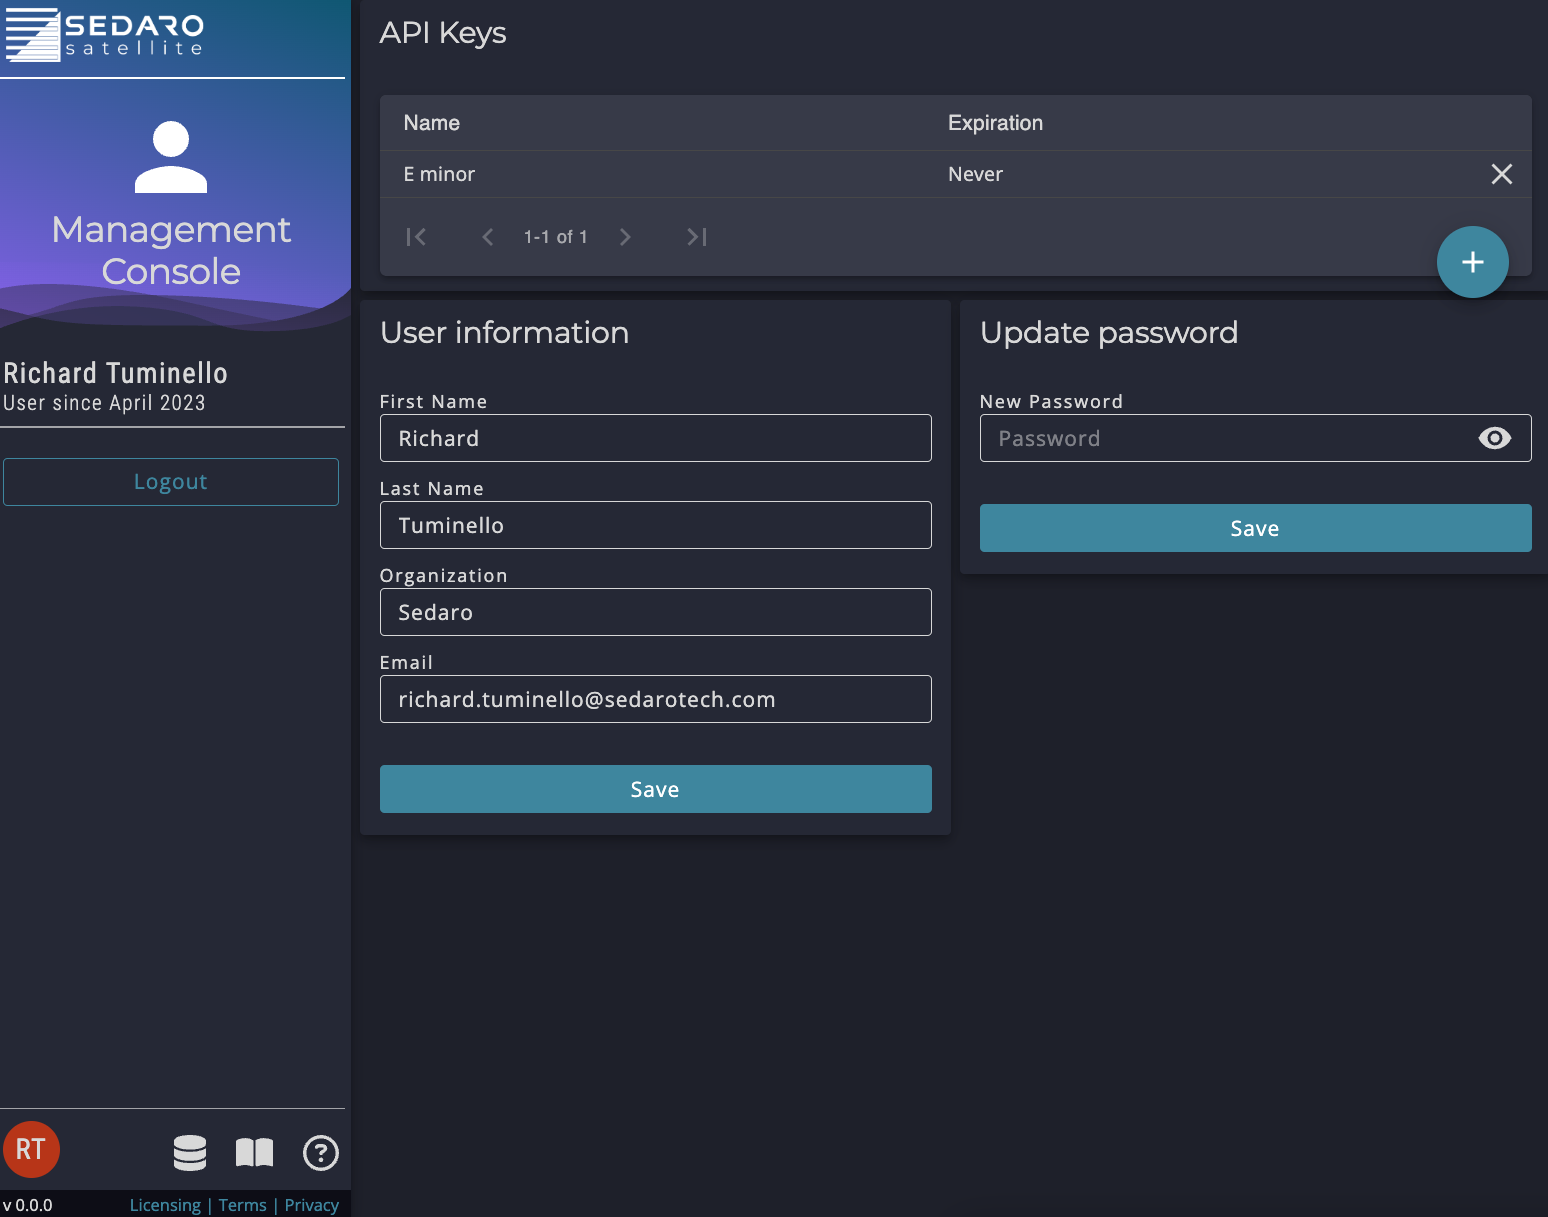
Account Management Page
Navigation Bar
The Navigation Bar is located on the left within each Repository. The contents will differ depending whether the current Repository is an Agent or Scenario.